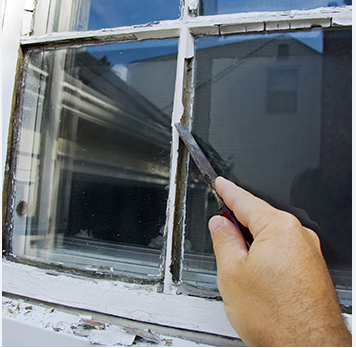
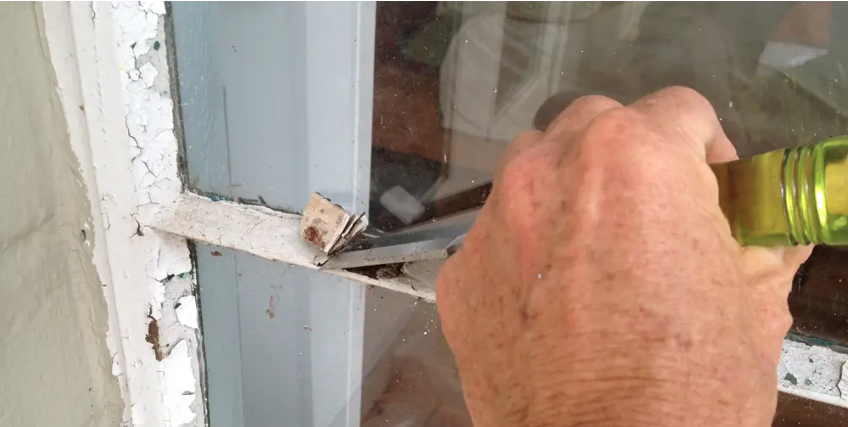
Sounds pretty basic, doesn’t it? It’s amazing how many times we are called in to fix work done by handymen or poor-quality glaziers who do an inferior job because they are trying to cut corners. Here’s a step-by-step guide to doing it properly – which takes skill and time. We’re not suggesting you do it yourself, but you can check whether the tradesman is doing it properly.
Step 1: Gather the necessary tools: Before you begin, assemble the required tools, including a putty knife, heat gun or hairdryer, safety goggles, gloves, and a drop cloth. These tools will ensure your safety and help make the putty removal process more efficient.
Step 2: Soften the old putty: Use a heat gun or hairdryer to soften the old putty. Apply heat to the putty by moving the heat source back and forth along the putty line. Be cautious not to overheat the glass or surrounding frame, as it may cause damage.
Step 3: Loosen and remove the old putty completely: Once the old putty is soft and pliable, gently insert a putty knife between the putty and the window frame. Apply pressure and carefully scrape away the putty, working in sections. If any stubborn areas resist removal, continue applying heat and repeat the scraping process until all the old putty is removed. This is important.
Step 4: Clean the window: After removing the old putty, clean the window surface using a glass cleaner or a mixture of water and vinegar. Ensure the window is thoroughly dry before proceeding to the reglazing process.
Now you can start by applying new putty and inserting the new window. We find that inferior glaziers hack out the old window, leave the old, brittle putty in place and insert the new window on top of the old putty, which often does not deliver a tight, waterproof fit. That’s when we get called in.


Pingback: buy backlinks to your site
Pingback: shiping containers for sale | shiping container for sale | shiping container price | used shiping containers | 40 ft containers for sale near me | storage container | shipping container homes for sale | buy shipping container home | 20ft container for sal
Pingback: Sylfirm
Pingback: ต่อผม
Pingback: 꽁머니
Pingback: ส่งพัสดุ
Pingback: ricco888
Pingback: endolift
Pingback: บริการรับสร้างบ้าน
Pingback: marriage counseling fairfax va
Pingback: xxxโอลี่เเฟน
Pingback: ทางเข้า lucabet
Pingback: betflix allstar
Pingback: pg slot เว็บตรง
Pingback: รับจํานํารถ
Pingback: bundle extractor
Pingback: BMW:s historia
Pingback: Skrota en gammal Ferrari
Pingback: rca77
Pingback: สล็อตเว็บตรง
Pingback: سایت بازی انفجار
Pingback: เครื่องซีลสูญญากาศ
Pingback: 789bet
Pingback: bangkok tattoo
Pingback: ไก่ตัน
Pingback: ilia
Pingback: h07vvh6-f
Pingback: สล็อตเกาหลี
Pingback: weight loss
Pingback: ปริ้นแผ่นพับ
Pingback: เช่าห้องเก็บของ
Pingback: Angthong National Marine Park
Pingback: ติดเน็ต ais
Pingback: สล็อต เครดิตฟรี
Pingback: pgslot
Pingback: ทดลองเล่นสล็อต pg
Pingback: รับนำเข้าสินค้าจากจีน
Pingback: links
Pingback: altogel
Pingback: https://lebandit.com.ar/
Pingback: pgslot
Pingback: เช่ารถตู้พร้อมคนขับ
Pingback: Learn more